Advertisement

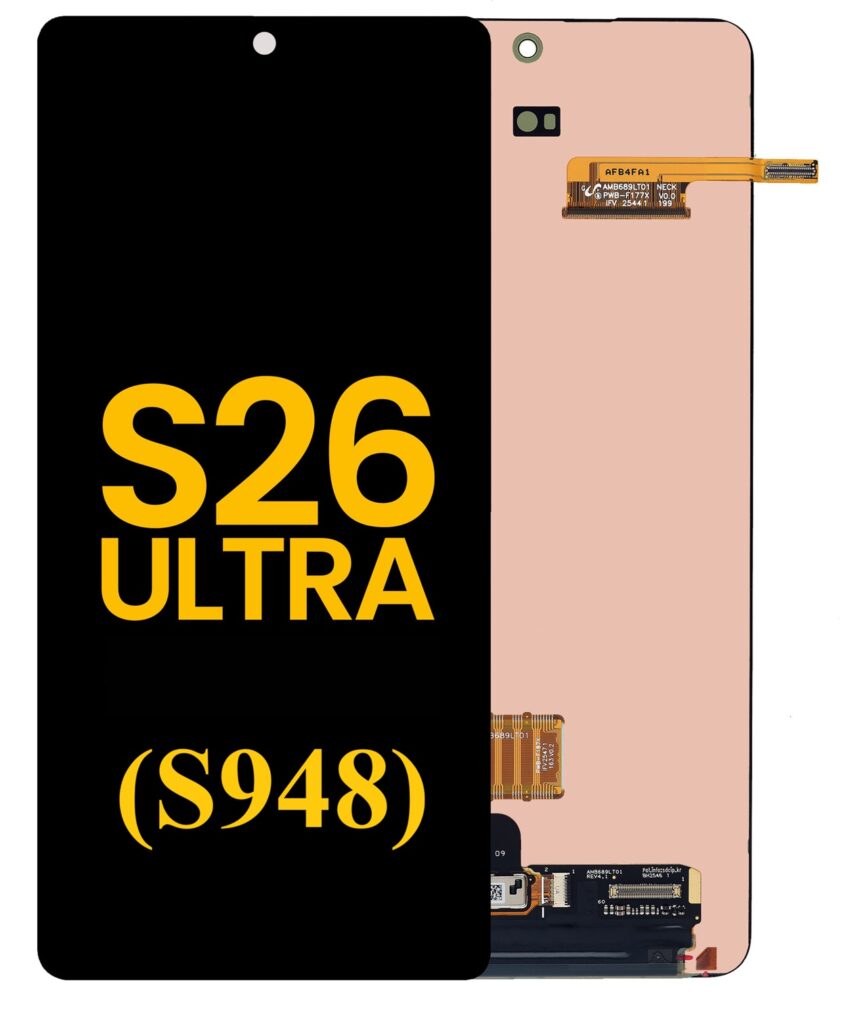
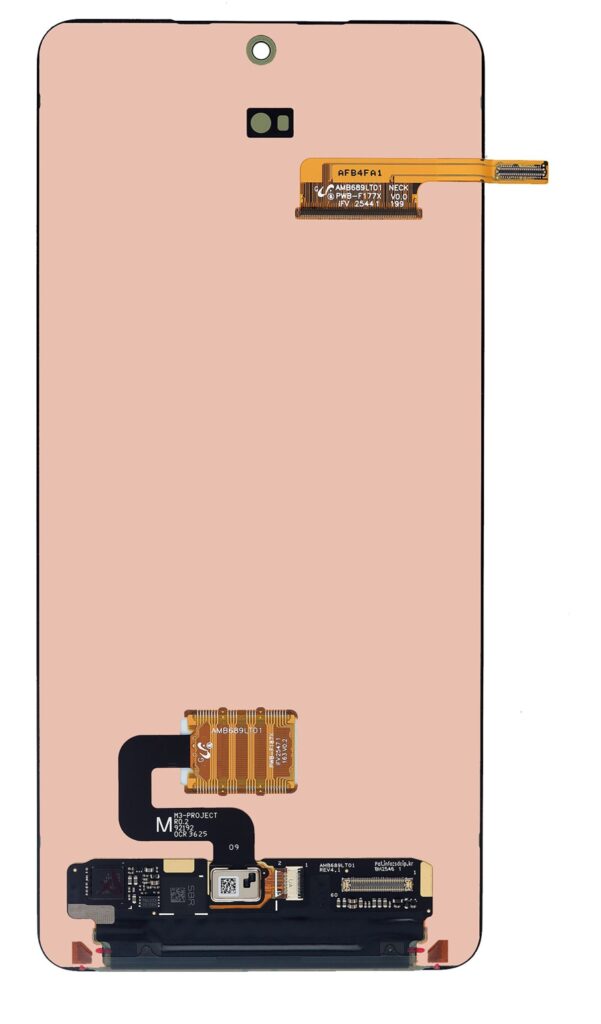
Fixing a damaged smartphone screen can feel overwhelming, especially when dealing with a premium flagship device like the Galaxy S26 Ultra (S948). With its advanced display technology, high refresh rate, and edge-to-edge design, repairing the original LCD or display assembly requires precision, patience, and the right tools.
This comprehensive guide will walk you through everything you need to know from diagnosing the issue to safely replacing the screen while ensuring your repair is done professionally and effectively. Whether you’re a technician, a DIY enthusiast, or simply looking to save money, this article is designed to help you achieve the best results.
Table of Contents
- Understanding the Galaxy S26 Ultra Display
- Common LCD Screen Problems
- Tools and Materials Required
- Safety Precautions Before Repair
- Step-by-Step Guide to Fixing the LCD Screen
- Tips for Maintaining Your New Screen
- Common Mistakes to Avoid
- Cost Comparison: DIY vs Professional Repair
- SEO Keywords with High Traffic Potential
- Conclusion
1. Understanding the Galaxy S26 Ultra Display
Advertisement
Before diving into the repair process, it’s important to understand what you’re dealing with.
The Galaxy S26 Ultra (S948) features a high-end display system that typically includes:
- AMOLED or Dynamic AMOLED panel
- Integrated touch digitizer
- In-display fingerprint sensor
- Gorilla Glass protection
Although commonly referred to as an LCD this device actually uses AMOLED technology. However, the term LCD is often used generically to describe the entire display assembly.
Key Components:
- Display panel (visual output)
- Touch sensor (digitizer)
- Glass layer (protection)
- Display flex cable (connectivity)
Damage to any of these components may require a full screen replacement.
Common LCD Screen Problems
Identifying the problem correctly helps determine whether repair or replacement is needed.
a. Cracked Screen
- Visible cracks on the glass
- Touch may still function
b. Black Screen or No Display
- Phone powers on but screen stays black
- Could indicate panel damage or loose connector
c. Flickering Display
- Screen flashes or dims intermittently
- Often caused by internal damage
d. Dead Pixels or Lines
- Colored lines or spots on screen
- Permanent pixel damage
e. Touch Not Responding
- Screen displays normally but does not respond to touch
- Faulty digitizer
3. Tools and Materials Required
Before starting the repair, gather all necessary tools:
Essential Tools:
- Precision screwdriver set
- Plastic opening tools
- Suction cup
- Heat gun or hair dryer
- Tweezers
- Isopropyl alcohol (90% or higher)
Replacement Parts:
- Original Galaxy S26 Ultra LCD/AMOLED screen assembly
- Adhesive strips or glue (B-7000 recommended)
Optional Tools:
- Anti-static wrist strap
- Magnetic mat for screws
Using original or high-quality replacement parts is crucial for maintaining display quality and durability.
4. Safety Precautions before Repair
Repairing a smartphone requires careful handling. Follow these precautions:
- Power off the device completely
- Remove SIM card tray
- Work on a clean, well-lit surface
- Avoid static electricity
- Do not overheat the device
- Handle flex cables gently
Failure to follow these precautions can cause further damage to the phone.
5. Step-by-Step Guide to Fixing the LCD Screen
Step 1: Power Off the Device
Ensure the phone is completely turned off to prevent electrical damage.
Step 2: Remove the Back Cover
- Apply heat to soften the adhesive
- Use a suction cup to lift the back panel
- Insert a plastic tool and gently pry around edges
Be careful not to crack the back glass.
Step 3: Disconnect the Battery
- Locate the battery connector
- Use a plastic tool to disconnect it
This step is critical for safety.
Step 4: Remove Internal Components
- Unscrew protective shields
- Remove connectors for display, camera, and other components
Keep screws organized to avoid confusion during reassembly.
Step 5: Remove the Broken Screen
- Heat the front of the phone to loosen adhesive
- Carefully separate the screen from the frame
- Disconnect the display flex cable
Take your time to avoid damaging the frame.
Step 6: Clean the Frame
- Remove old adhesive
- Use isopropyl alcohol to clean residue
A clean surface ensures proper bonding of the new screen.
Step 7: Install the New LCD Screen
- Connect the new display flex cable
- Test the screen before sealing
Check for:
- Display clarity
- Touch responsiveness
- Fingerprint sensor functionality
Step 8: Apply Adhesive and Reassemble
- Apply adhesive around the frame
- Place the new screen securely
- Reassemble all components in reverse order
Step 9: Final Testing
Once reassembled:
- Power on the device
- Test touch, brightness, and sensors
- Ensure everything functions properly
6. Tips for Maintaining Your New Screen
After replacing the screen, follow these tips to extend its lifespan:
- Use a high-quality screen protector
- Install a durable phone case
- Avoid dropping the device
- Keep away from extreme temperatures
- Clean screen regularly with microfiber cloth
7. Common Mistakes to Avoid
Avoid these frequent errors during repair:
- Using metal tools (can cause short circuits)
- Skipping the test before final assembly
- Overheating the device
- Losing screws or mixing them up
- Using low-quality replacement parts
8. Cost Comparison: DIY vs Professional Repair
DIY Repair:
- Cost: Lower
- Risk: Higher
- Skill required: Moderate to high
Professional Repair:
- Cost: Higher
- Risk: Lower
- Warranty: Often included
If you’re inexperienced, professional repair may be the safer option.
To help this article rank higher in search engines, here are high-demand keywords:
- Galaxy S26 Ultra screen replacement
- Fix Samsung S26 Ultra LCD
- S948 screen repair guide
- Samsung phone screen repair DIY
- AMOLED screen replacement tutorial
- Fix cracked Samsung screen at home
- Smartphone display repair guide
- Samsung Ultra screen replacement cost
- Repair Galaxy S26 Ultra display
- How to fix broken phone screen
Using these keywords strategically throughout your content improves SEO performance and visibility.
Fixing the Galaxy S26 Ultra (S948) original LCD screen may seem challenging, but with the right tools, patience, and guidance, it is entirely achievable. Whether you’re replacing a cracked display or troubleshooting touch issues, following a structured repair process ensures success.
Always prioritize safety, use high-quality parts, and test thoroughly before completing the repair. If done correctly, your device can look and function like new again saving you money and extending the life of your smartphone.
12. Advanced Troubleshooting After Screen Replacement
Even after successfully installing a new screen on your Galaxy S26 Ultra (S948), you might encounter minor issues that require additional troubleshooting. These problems are usually easy to fix if you know what to look for.
Screen Not Turning On
If the device powers on but the display remains black:
- Recheck the display flex cable connection
- Ensure the battery connector is properly seated
- Try a forced restart (Power + Volume Down)
- Test with another screen (if available) to rule out a defective part
Touch Sensitivity Issues
If touch input feels delayed or unresponsive:
- Make sure the screen is firmly seated
- Check for dirt or adhesive interfering with connectors
- Restart the phone to recalibrate touch response
- Update software to ensure compatibility
c. Fingerprint Sensor Not Working
Because the Galaxy S26 Ultra uses an in-display fingerprint sensor:
- Ensure you installed a compatible original screen
- Re-register fingerprints after replacement
- Clean the screen surface thoroughly
- Check for software updates
d. Display Color or Brightness Problems
If colors appear dull or brightness is uneven:
- Verify you are using an original AMOLED screen
- Adjust display settings (brightness, color profile)
- Check for loose connections
- Perform a factory reset if necessary (backup data first)
13. Importance of Using Original vs Aftermarket Screens
One of the most important decisions in screen repair is choosing between an original (OEM) display and an aftermarket replacement.
Original (OEM) Screen:
- Superior color accuracy and brightness
- Full compatibility with fingerprint sensor
- Longer lifespan
- Better touch sensitivity
Aftermarket Screen:
- Lower cost
- Variable quality
- Possible compatibility issues
- Reduced brightness or refresh rate
For a premium device like the Galaxy S26 Ultra, investing in an original screen is highly recommended for the best user experience.
14. Environmental Factors That Affect Screen Longevity
Many users overlook how environmental conditions impact smartphone screens. After replacing your LCD, keep these factors in mind:
Temperature Extremes
High heat can weaken adhesive and damage display components, while extreme cold can make the screen brittle.
Moisture and Humidity
Water exposure can lead to internal corrosion, even if the screen appears fine externally.
Dust and Debris
Particles can enter through small gaps and affect internal components over time.
Pressure and Impact
Keeping your phone in tight pockets or dropping it frequently increases the risk of screen damage.
15. When You Should Not Attempt DIY Repair
While DIY repair can save money, there are situations where it’s best avoided?
- If the motherboard is damaged
- If the phone has water damage
- If you lack proper tools
- If the device is still under warranty
- If you’re not confident in handling delicate components
In these cases, taking your device to a certified technician is the safer choice.
16. How Long Does Screen Replacement Take?
The time required to fix a Galaxy S26 Ultra screen depends on your experience level
- Beginners: 1.5 to 3 hours
- Intermediate users: 45 minutes to 1.5 hours
- Professional technicians: 30 to 60 minutes
Taking your time is crucial rushing increases the risk of mistakes.
17. Best Practices for Professional-Level Repair
If you want your repair to look and feel factory-finished, follow these expert tips
- Use a heat mat instead of a hair dryer for even heating
- Apply adhesive evenly to avoid gaps
- Use clamps or rubber bands to secure the screen while drying
- Work in a dust-free environment
- Always test before sealing the device
These practices significantly improve the quality and durability of your repair.
18. Data Safety during Repair
One major concern during any phone repair is data protection. While screen replacement does not usually affect internal storage, it’s always wise to take precautions:
- Back up your data before starting
- Remove your SIM and SD card
- Avoid disconnecting unnecessary components
- Do not perform a factory reset unless required
Protecting your data ensures peace of mind throughout the repair process.
19. Future-Proofing Your Device
After successfully replacing your screen, consider additional steps to protect your investment:
- Install a tempered glass protector immediately
- Use shockproof cases with raised edges
- Enable accidental touch protection in settings
- Avoid placing heavy objects on your phone
- Keep software updated for optimal performance
These simple habits can prevent future damage and reduce repair costs.
Final Thoughts
Repairing the Galaxy S26 Ultra (S948) original LCD screen is not just about fixing a broken display it’s about restoring the full functionality and premium experience of your device. With careful attention to detail, the right tools, and a methodical approach, even complex repairs can be handled successfully.
Whether you’re doing it for cost savings, learning experience, or professional purposes, mastering smartphone screen repair is a valuable skill. By following the extended guidance in this article, you are now equipped with both foundational knowledge and advanced techniques to carry out a safe and effective repair.
Remember: patience and precision are your best tools.
21. Understanding Screen Adhesive and Sealing Techniques
One of the most overlooked aspects of replacing the Galaxy S26 Ultra (S948) screen is proper sealing. The adhesive you use and how you apply it can determine how long your repair lasts.
Modern smartphones are designed with strong adhesive seals to maintain durability and resistance to dust and minor moisture. When replacing the screen:
- Use high-quality adhesive like B-7000 or pre-cut adhesive strips
- Apply adhesive evenly along the frame edges
- Avoid excessive glue, which can seep into internal components
- Allow sufficient drying time (typically 30–60 minutes minimum, 24 hours ideal)
Proper sealing not only secures the display but also restores some level of structural integrity to the device.
22. The Role of Software Calibration After Screen Replacement
After installing a new display, many users assume the job is complete—but software calibration can significantly improve performance.
Recommended Calibration Steps:
- Restart the device after installation
- Adjust brightness and display settings
- Enable adaptive display mode
- Recalibrate touch sensitivity in settings (if available)
- Update the device to the latest software version
Some smartphones automatically optimize new hardware components, so keeping your system updated ensures the best compatibility with the new screen.
23. Signs of a Poor Screen Installation
Not all repairs are done perfectly, especially for beginners. Knowing the warning signs of a poor installation can help you fix issues early before they worsen.
Watch Out For:
- Screen lifting from edges
- Uneven gaps between frame and display
- Dust particles visible under the screen
- Touch delay or ghost touches
- Screen flickering when pressed
If you notice any of these issues, it’s best to reopen the device and correct the problem before the adhesive fully cures.
24. How to Source Genuine Replacement Screens
Finding a genuine Galaxy S26 Ultra (S948) screen can be challenging, especially with many counterfeit parts in the market.
Tips for Buying Authentic Parts:
- Purchase from reputable suppliers or certified dealers
- Check reviews and ratings before buying
- Look for OEM labeling or manufacturer certification
- Avoid extremely cheap listings they often indicate low quality
- Verify return policies in case the part is defective
Using a genuine screen ensures better performance, durability, and compatibility with advanced features like the fingerprint sensor.
25. The Impact of Screen Quality on User Experience
Your smartphone screen is the primary way you interact with your device, so its quality directly affects your daily usage.
High-Quality Screen Benefits:
- Smooth scrolling and responsiveness
- Accurate color reproduction
- Better visibility in sunlight
- Reduced eye strain
- Enhanced gaming and media experience
On the other hand, a low-quality replacement screen can make even a premium phone feel cheap and unresponsive.
26. Preventing Future Screen Damage
Once you’ve invested time and money into replacing your screen, preventing future damage should be a priority.
Practical Prevention Tips:
- Always use a protective case with shock absorption
- Avoid placing your phone face-down on rough surfaces
- Keep it away from sharp objects like keys
- Use a tempered glass screen protector
- Be cautious during outdoor activities
Accidents can happen, but taking these precautions significantly reduces the risk.
27. Repair vs Replacement: When to Upgrade Instead
In some situations, fixing your Galaxy S26 Ultra screen might not be the most practical option.
Consider Upgrading If:
- Repair costs exceed 50% of the phone’s value
- Multiple components are damaged
- The phone has recurring hardware issues
- You want access to newer features and improved performance
However, if your device is still in good condition aside from the screen, repair is usually the more cost-effective choice.
28. Professional Tools That Improve Repair Accuracy
While basic tools can get the job done, professional-grade equipment can make a significant difference.
Advanced Tools Include:
- Heat mat with temperature control
- LCD separator machine
- Vacuum screen holder
- Precision screw organizers
- Anti-static workstation setup
These tools are especially useful for technicians or those planning to perform multiple repairs.
29. Warranty Considerations and Legal Aspects
Before opening your Galaxy S26 Ultra, it’s important to understand the warranty implications.
- Opening the device usually voids the manufacturer warranty
- Unauthorized repairs may affect future service eligibility
- Always check warranty status before attempting DIY repair
- Consider authorized service centers if your device is still covered
Being aware of these factors helps you make an informed decision.
30. Building Skills in Smartphone Repair
If you found this guide helpful, you might consider learning more about smartphone repair as a valuable skill.
Benefits of Learning Phone Repair:
- Save money on personal repairs
- Start a repair business
- Help friends and family
- Gain technical knowledge
Start with simple repairs and gradually move to more complex tasks as your confidence grows.
31. Final Extended Conclusion
Fixing the Galaxy S26 Ultra (S948) original LCD screen is a detailed process that combines technical skill, patience, and the right approach. From diagnosing the issue to completing a professional-level repair, every step plays a critical role in restoring your device to optimal condition.
This extended guide has not only shown you how to replace the screen but also how to troubleshoot issues, choose the right parts, maintain your device, and avoid common pitfalls. By applying these best practices, you can achieve results comparable to professional repair services.
In today’s world, where smartphones are essential tools for communication, work, and entertainment, knowing how to repair them is more valuable than ever. Whether you’re fixing your own device or helping others, mastering screen replacement is a practical and rewarding skill.
With careful execution and attention to detail, your Galaxy S26 Ultra can look and perform just like new proving that even complex repairs are possible with the right guidance.
Advertisement